
If you are looking for;
- How to program Arduino Mini Pro with FTDI USB-to-TTL serial converter 6 pins with DTR (reset pin)
- How to program Arduino Mini Pro without using Arduino board as ISP
This post probably will help you.
Requires:
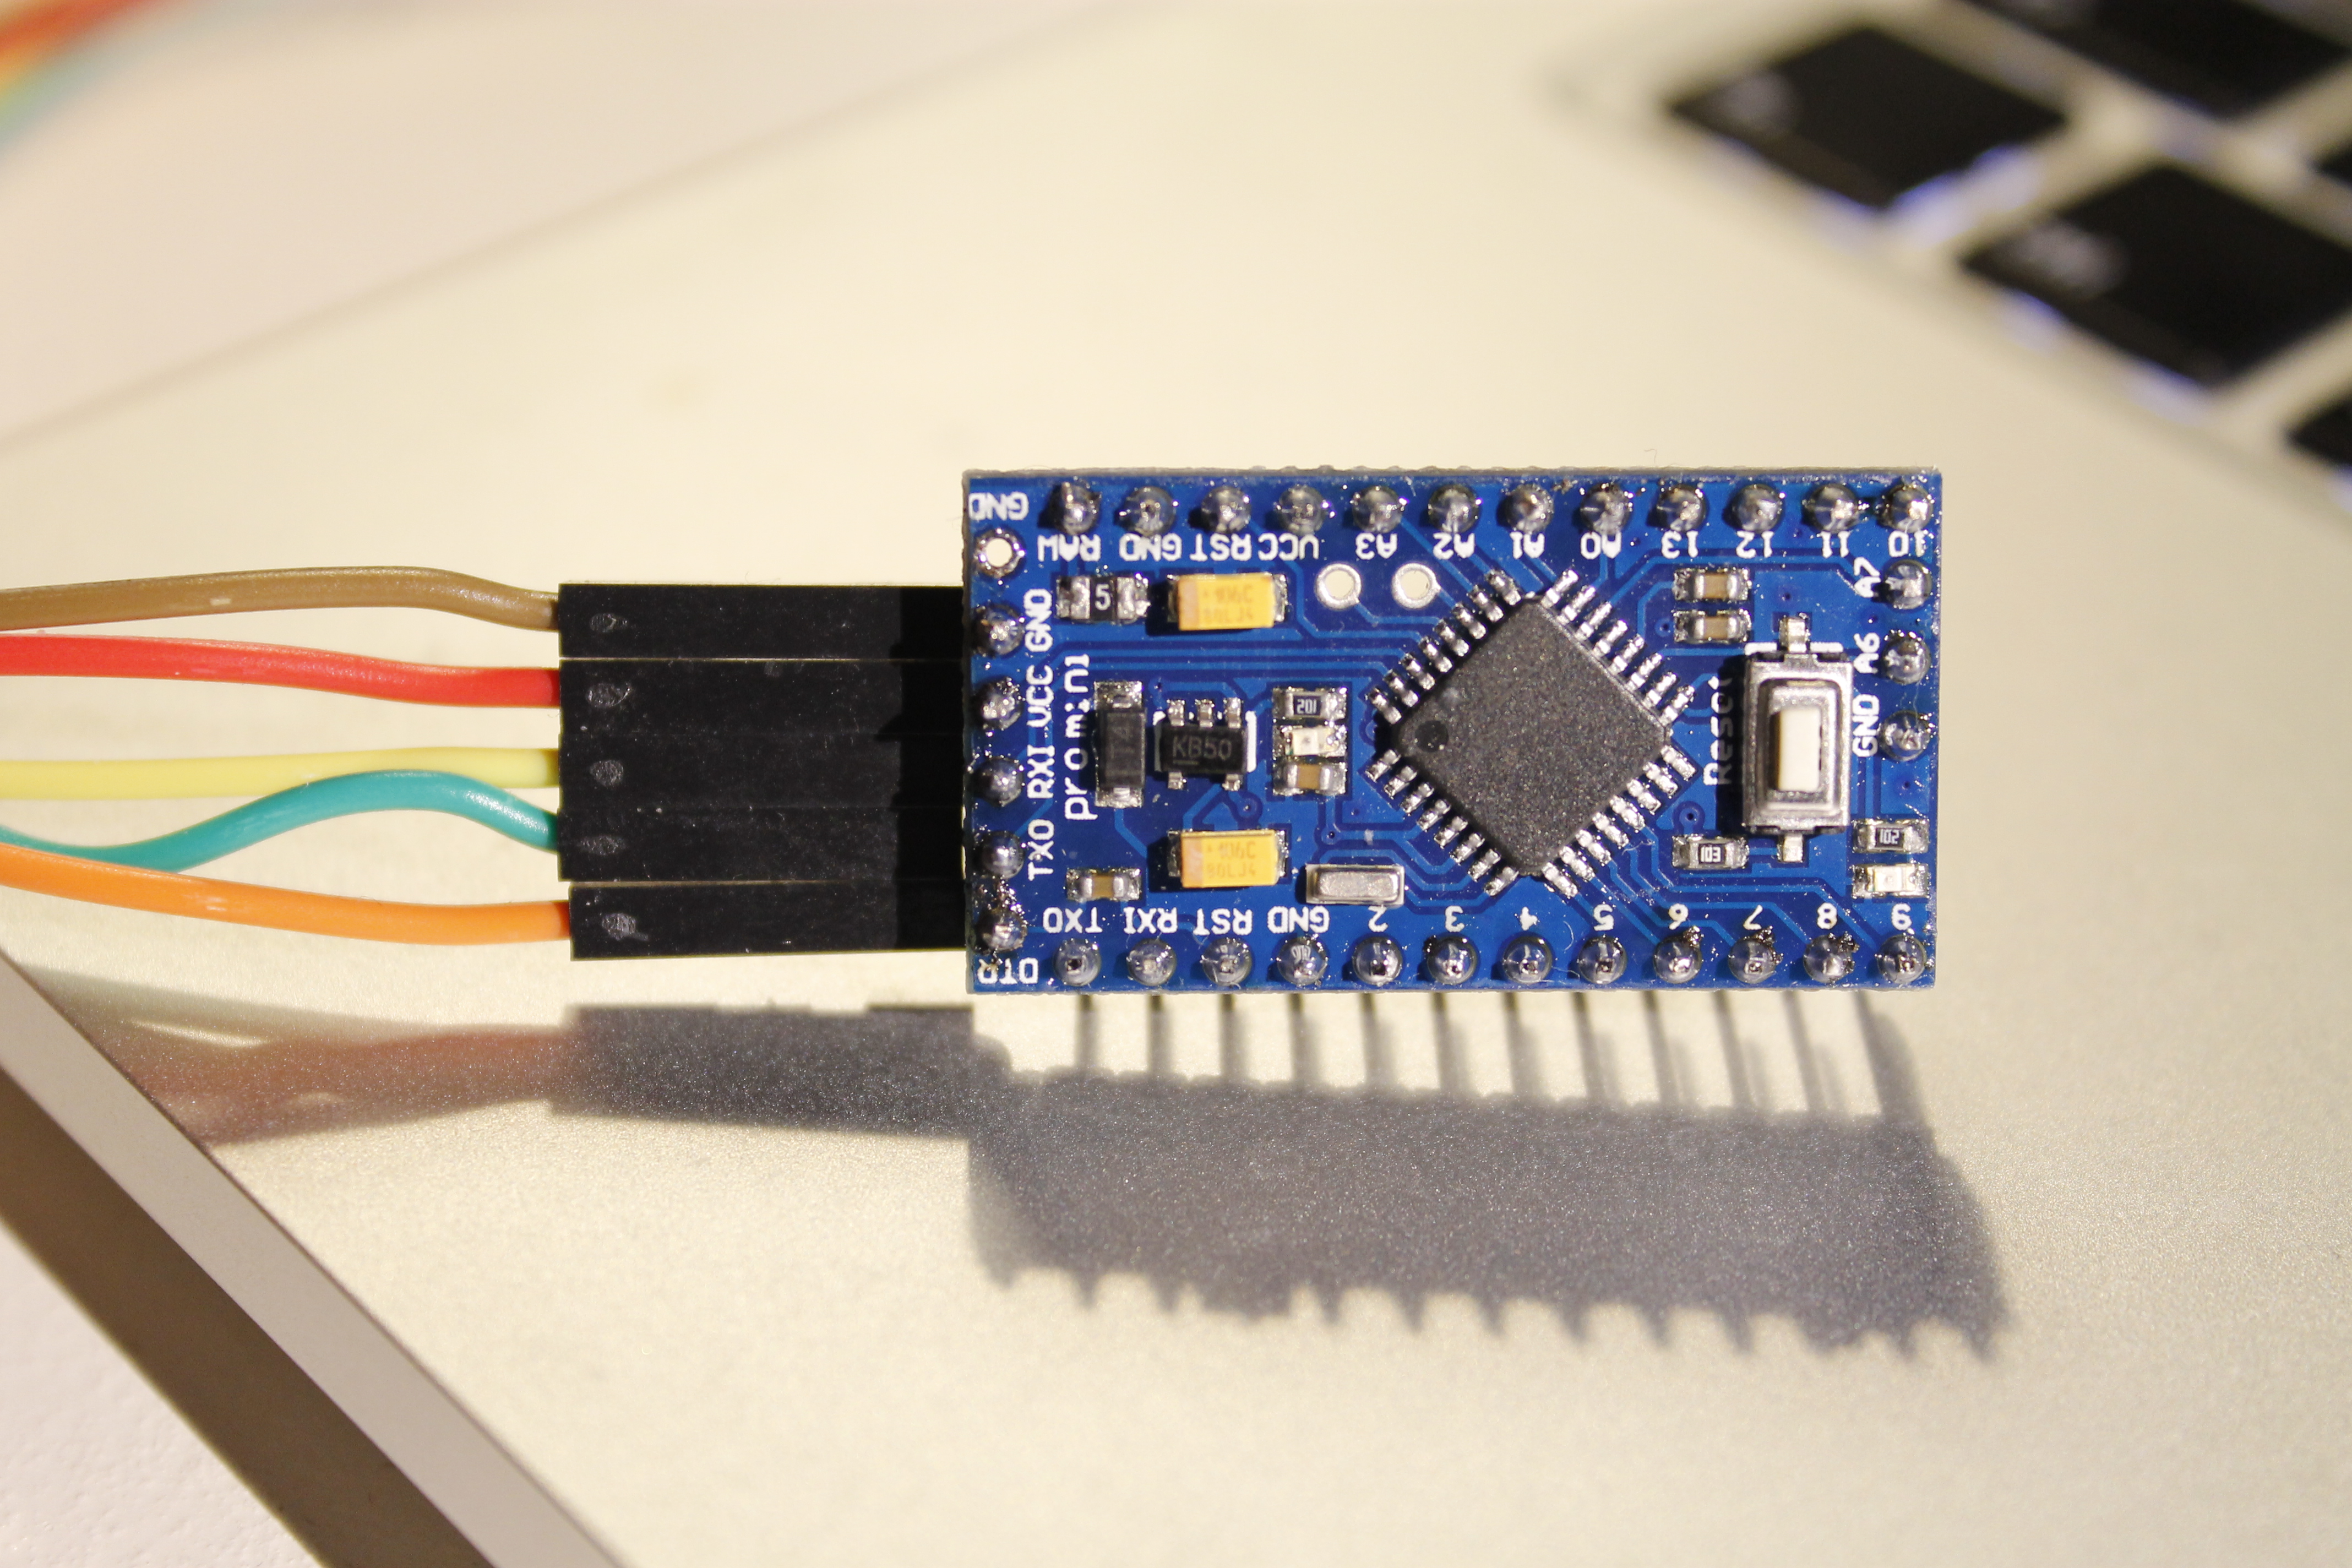
- Arduino Mini Pro (In this example I’m using Arduino Mini Pro 5v / 16Mhz version)
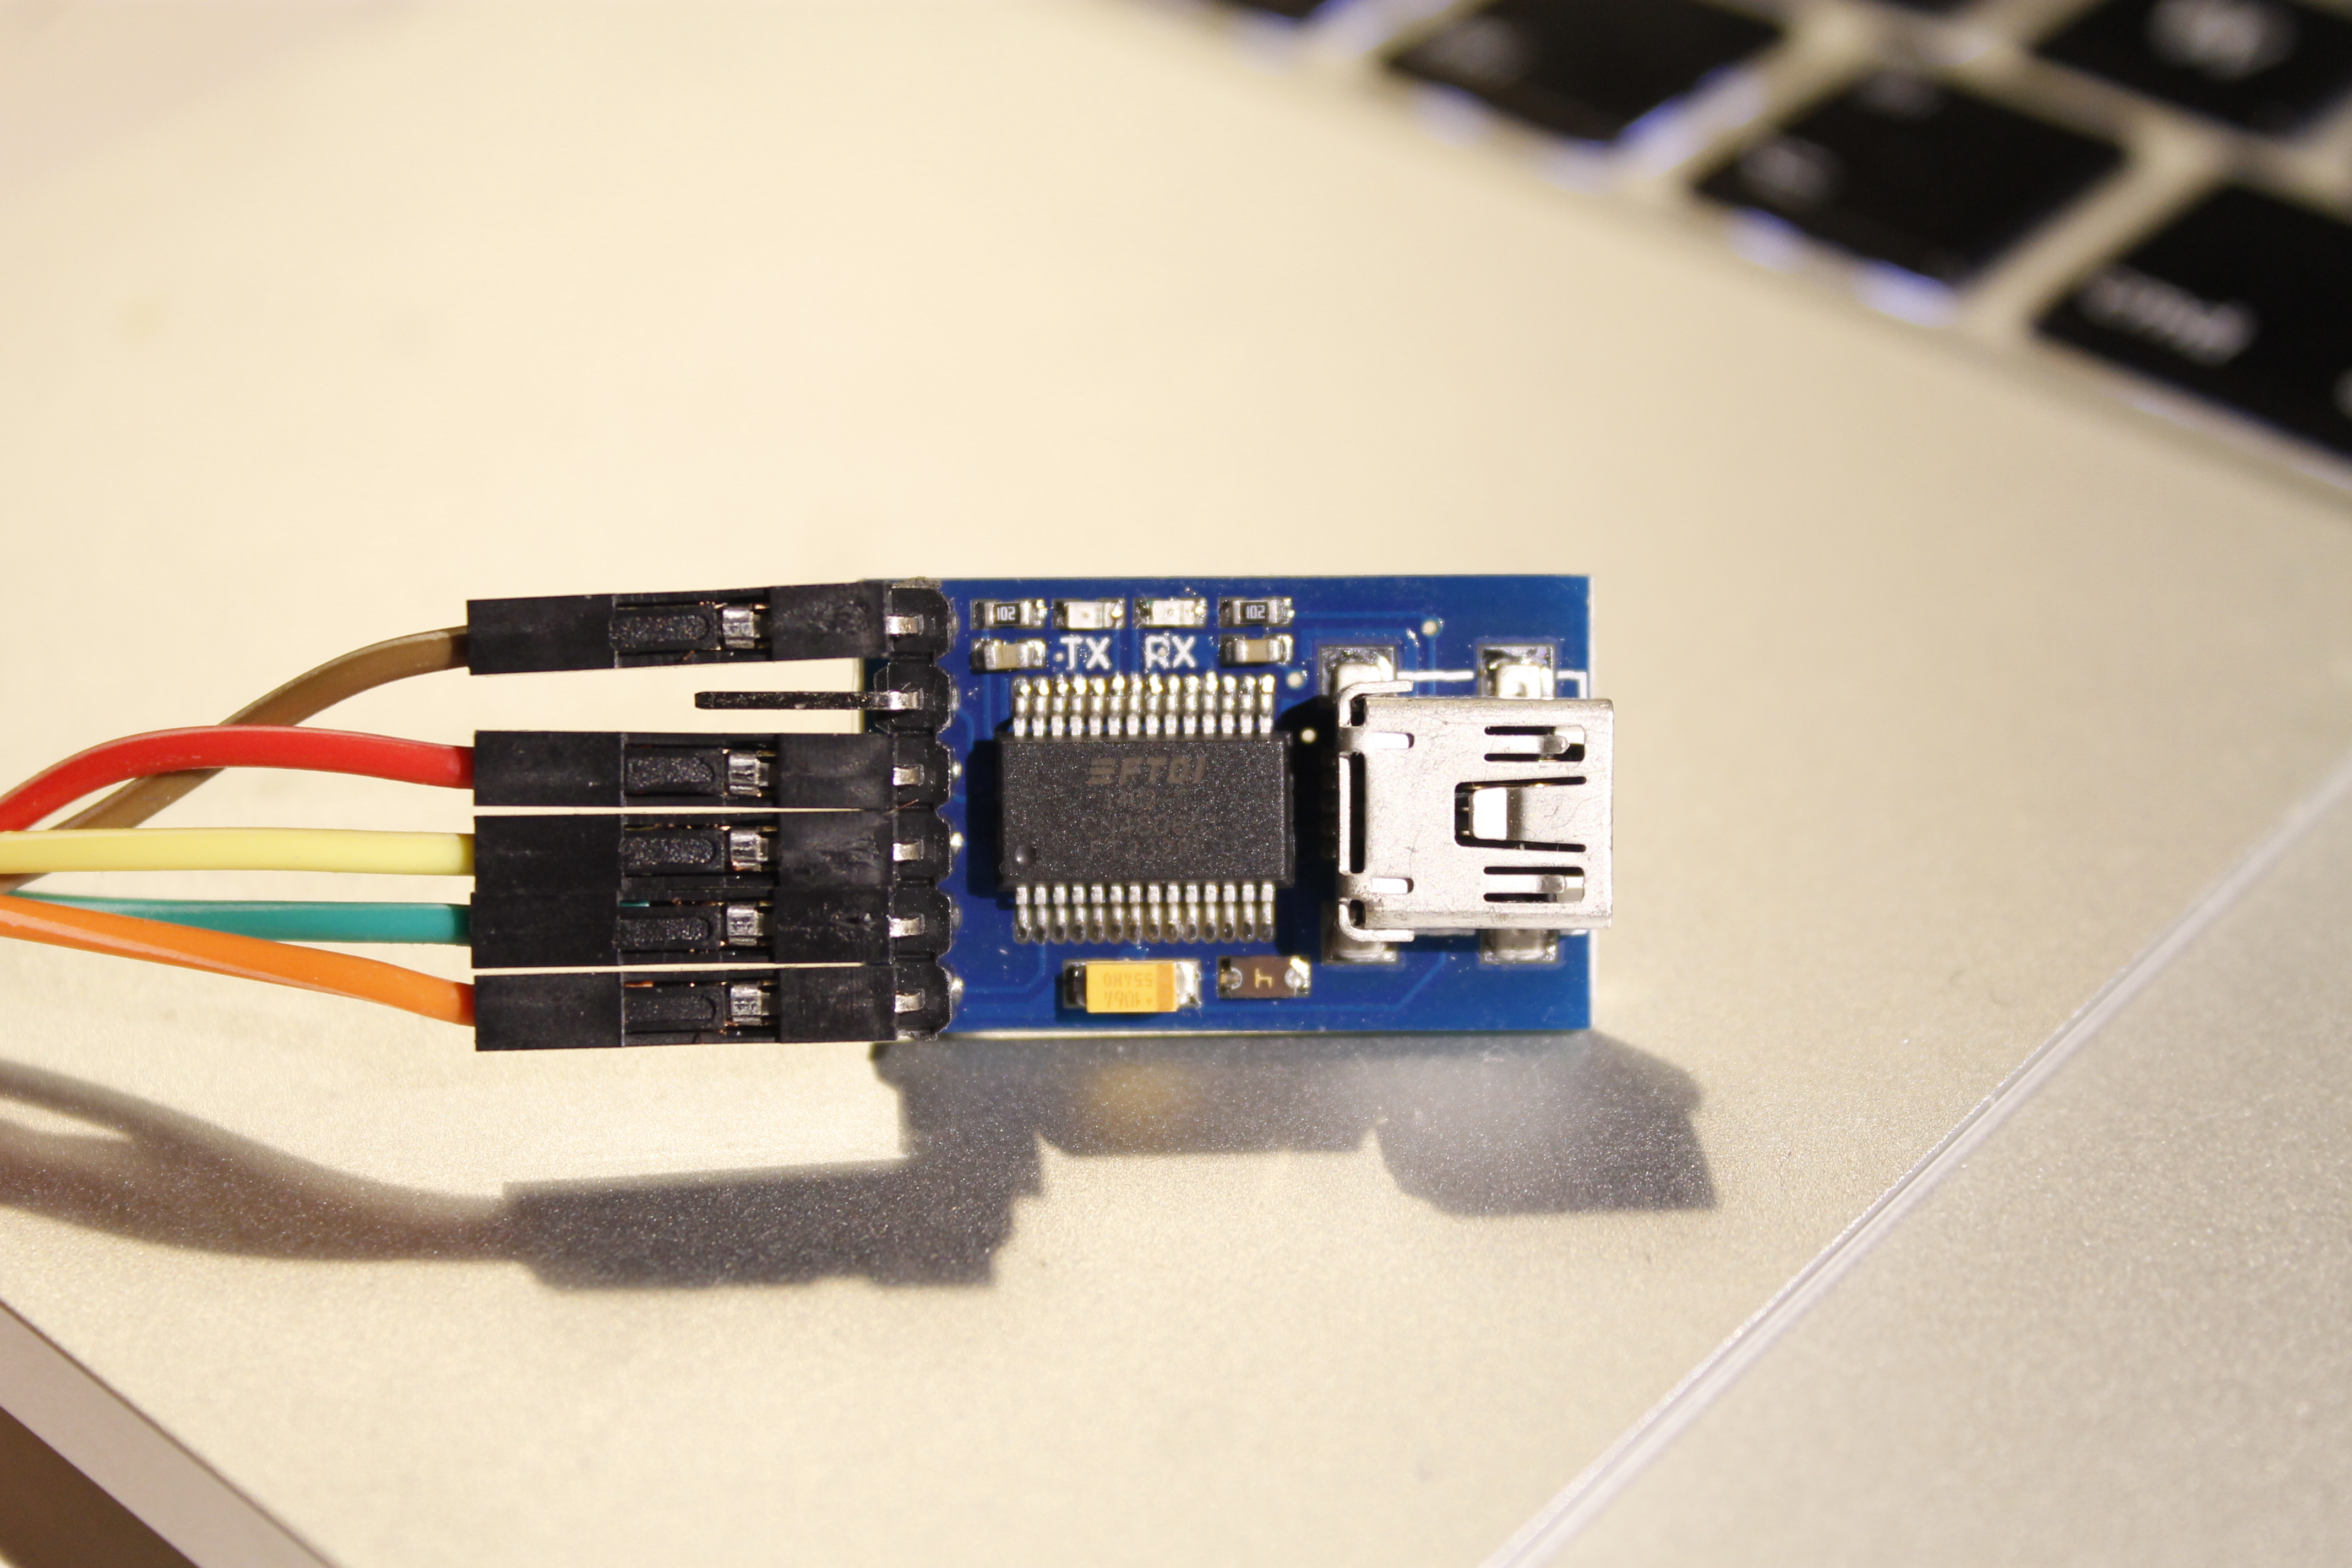
- FTDI USB-to-TTL (Drivers for Mac, Windows, Linux)
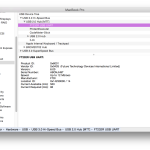
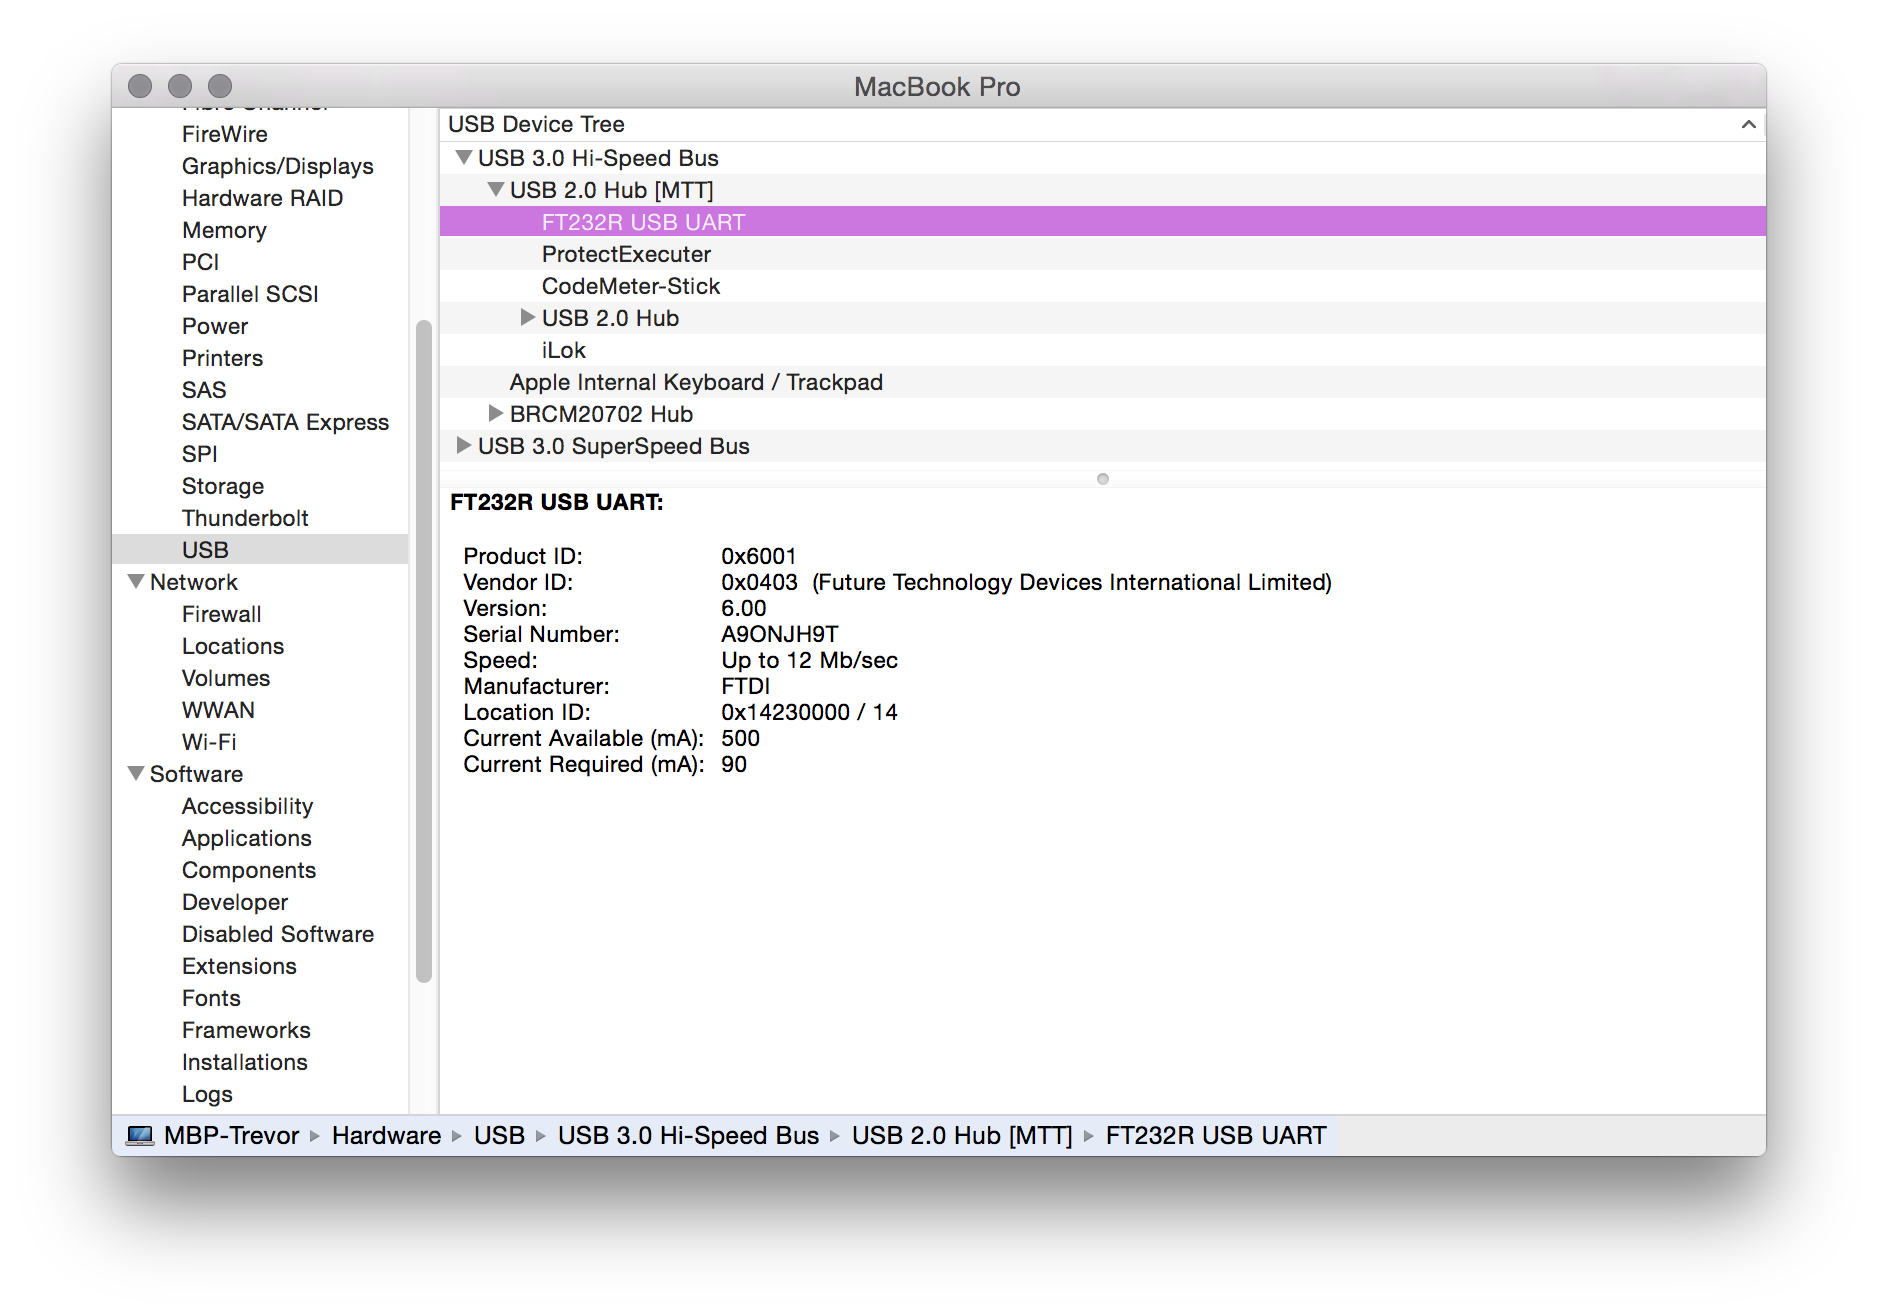
USP view in system
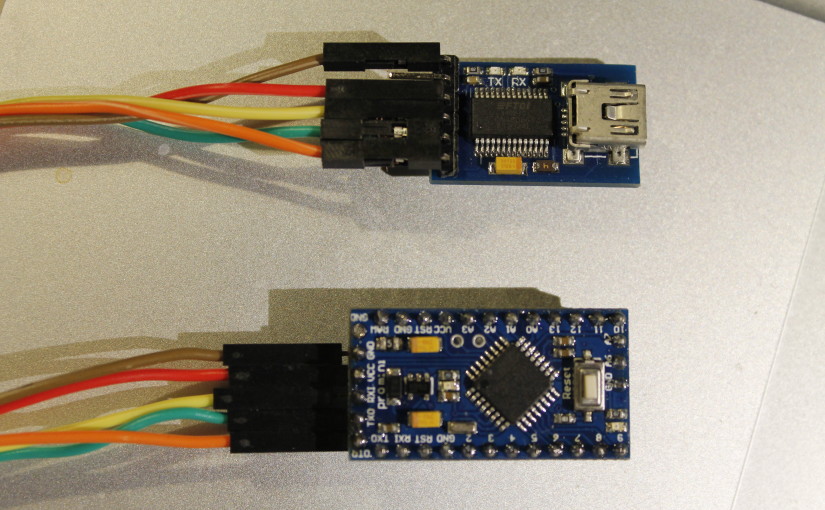
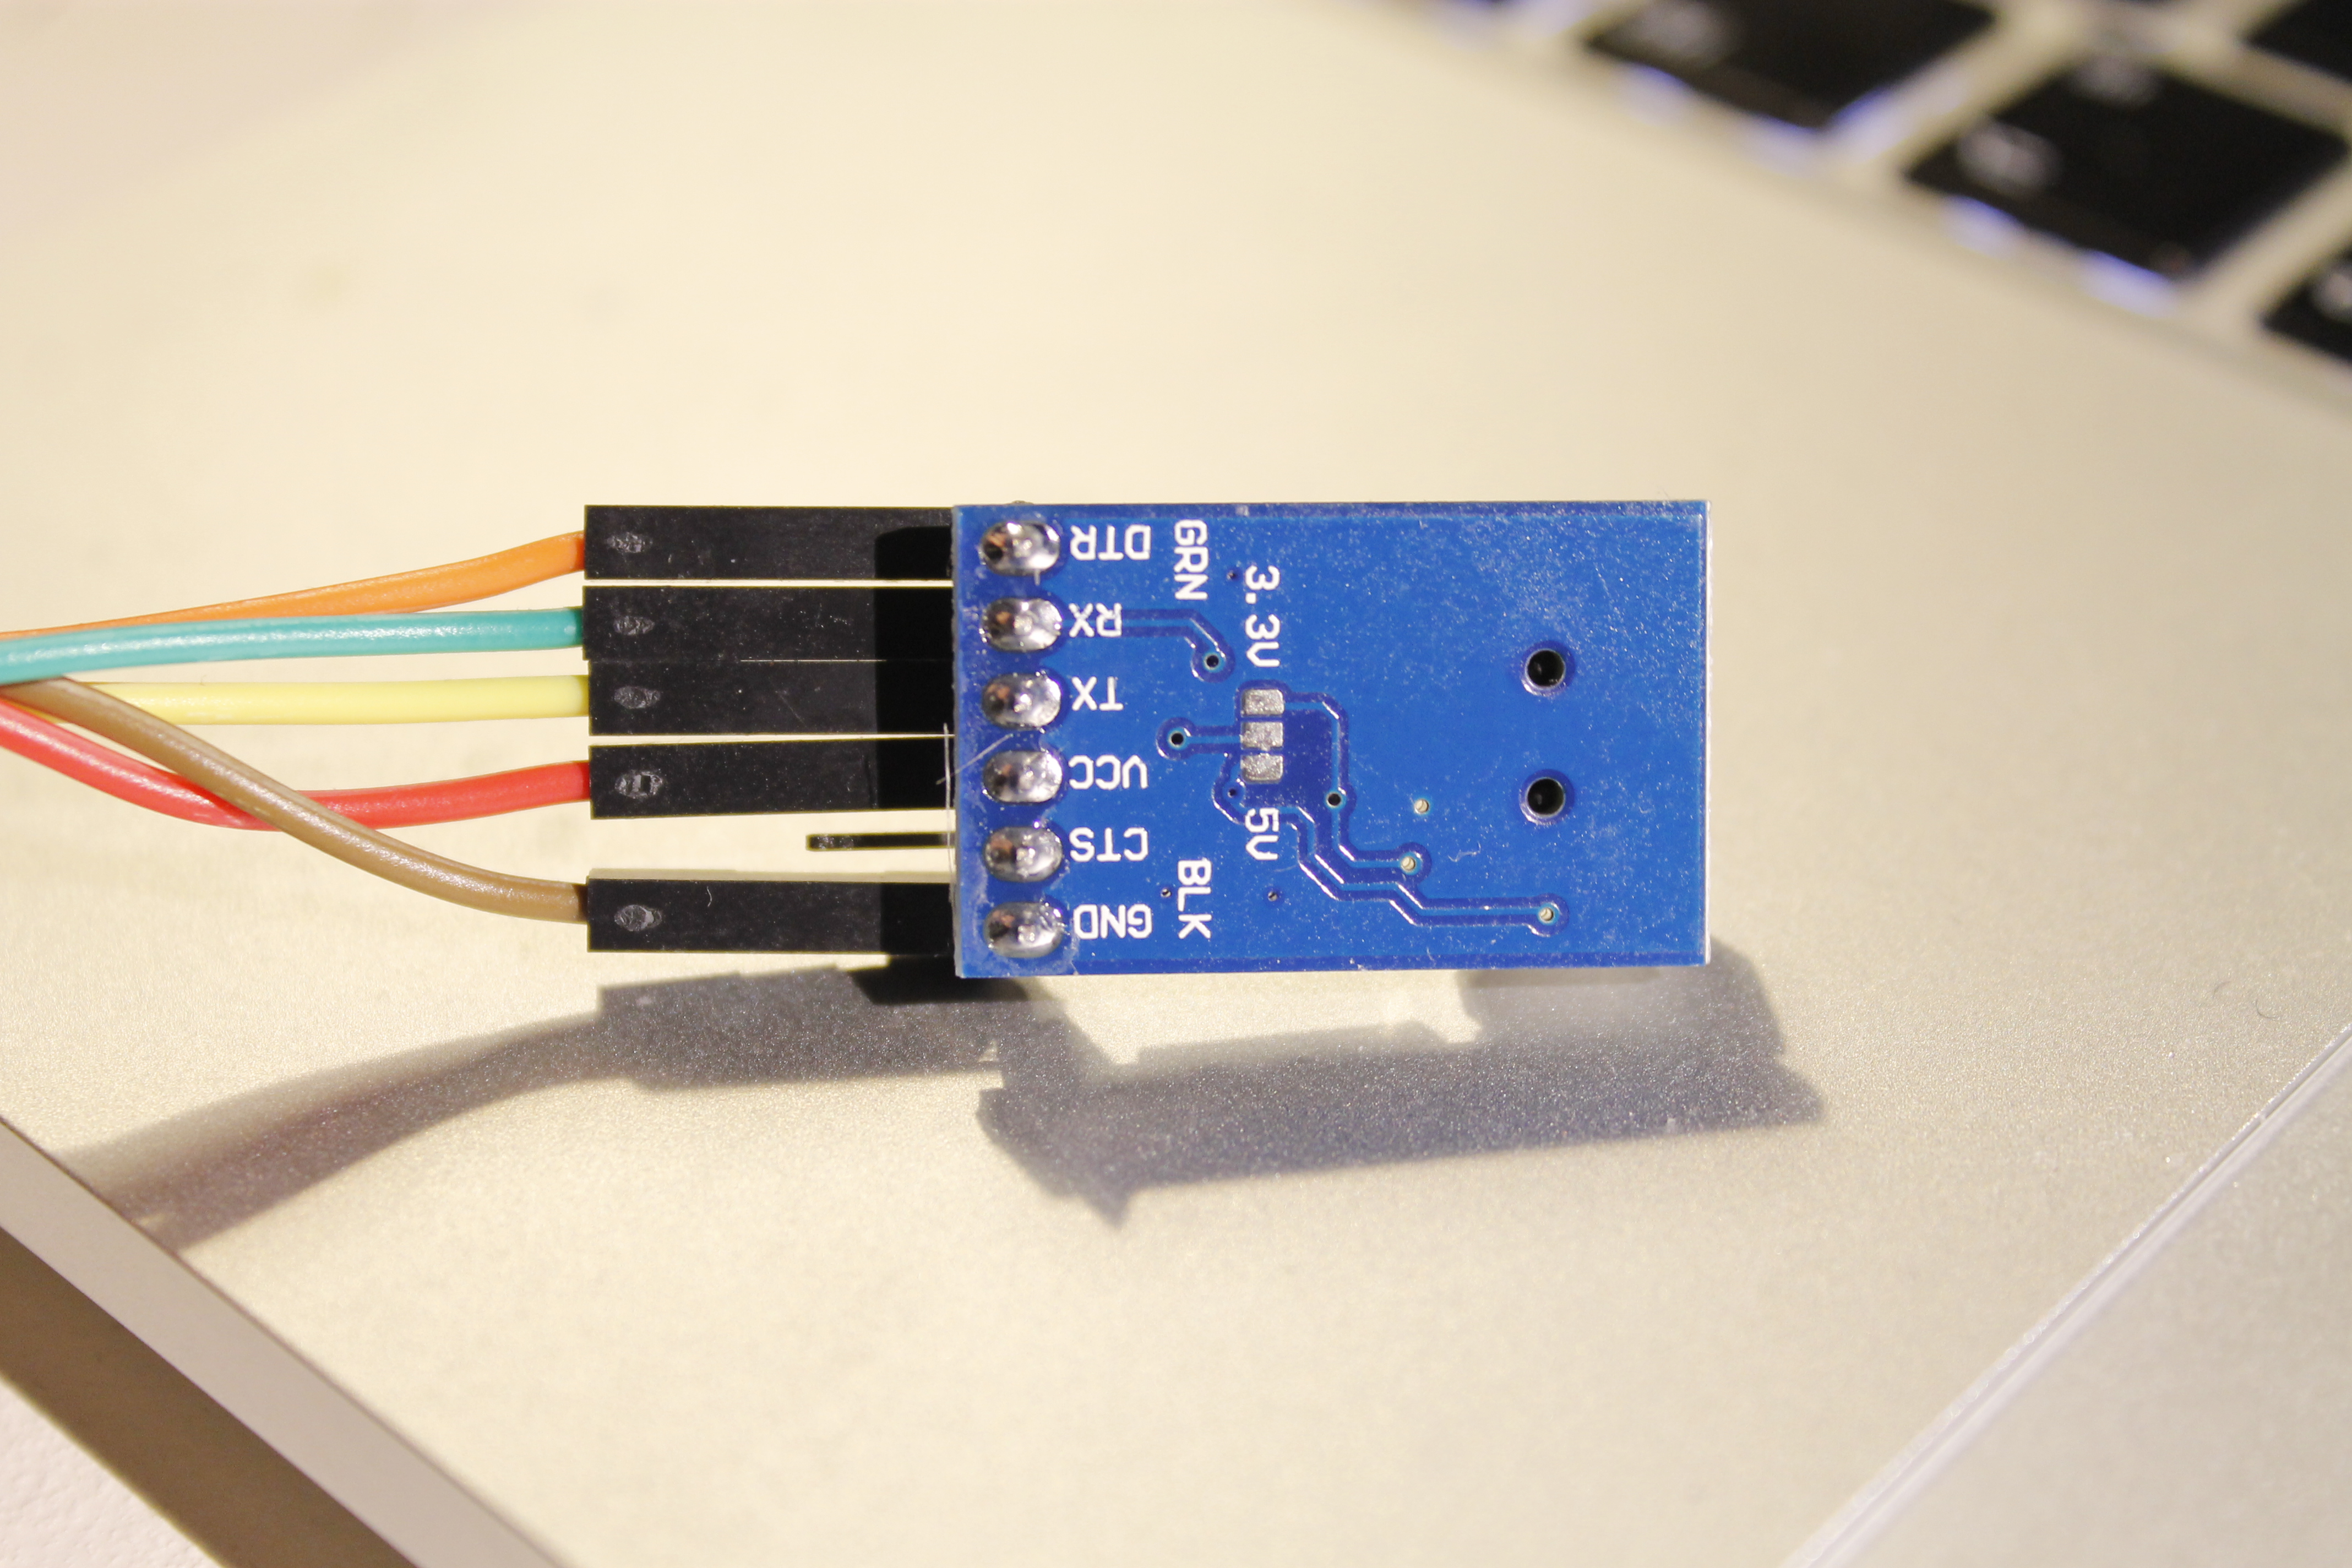
Connections FTDI USB-to-TTL 6pins to Arduino Mini Pro:
- FTDI USB-to-TTL: TX (yellow) -> Arduino Mini Pro RX
- FTDI USB-to-TTL: RX (green) -> Arduino Mini Pro TX
- FTDI USB-to-TTL: GND (brown) -> Arduino Mini Pro GND
- FTDI USB-to-TTL: +5Vcc (red) -> Arduino Mini Pro VCC
- FTDI USB-to-TTL: DTR (orange) -> Arduino Mini Pro Reset
- FTDI USB-to-TTL: CTS (non connected)
Uploading Sketch with Arduino IDE
I’m currently using Arduino 1.5.5. I configured it as below;
- Arduino IDE -> Tools -> Board -> Arduino Pro or Pro Mini
- Arduino IDE -> Tools -> Processor -> ATmega328 (5V, 16 MHz)
- Arduino IDE -> Tools -> Port -> /dev/tty.usbserial-A9ONJH9T
- Arduino IDE -> Tools -> Programmer -> AVRISP mkII
- /dev/tty.usbserial-A9ONJH9T is the name of serial port shown on Mac OS X. On windows you should see comX (X is a number)
- To find serial port name list, write on terminal;
username$ ls -l /dev/tty.*
The FTDI USB-to-TTL have 6 pin with auto reset functionality. So everything function as normal Arduino Uno board. (No need to reset after upload like CP2112 5pins version I have)
- Click on upload sketch (green right arrow)
- As soon as you see “Compiling sketch…” on status bar, click on reset button.
- If your timing is good you’ll see “Done uploading.”
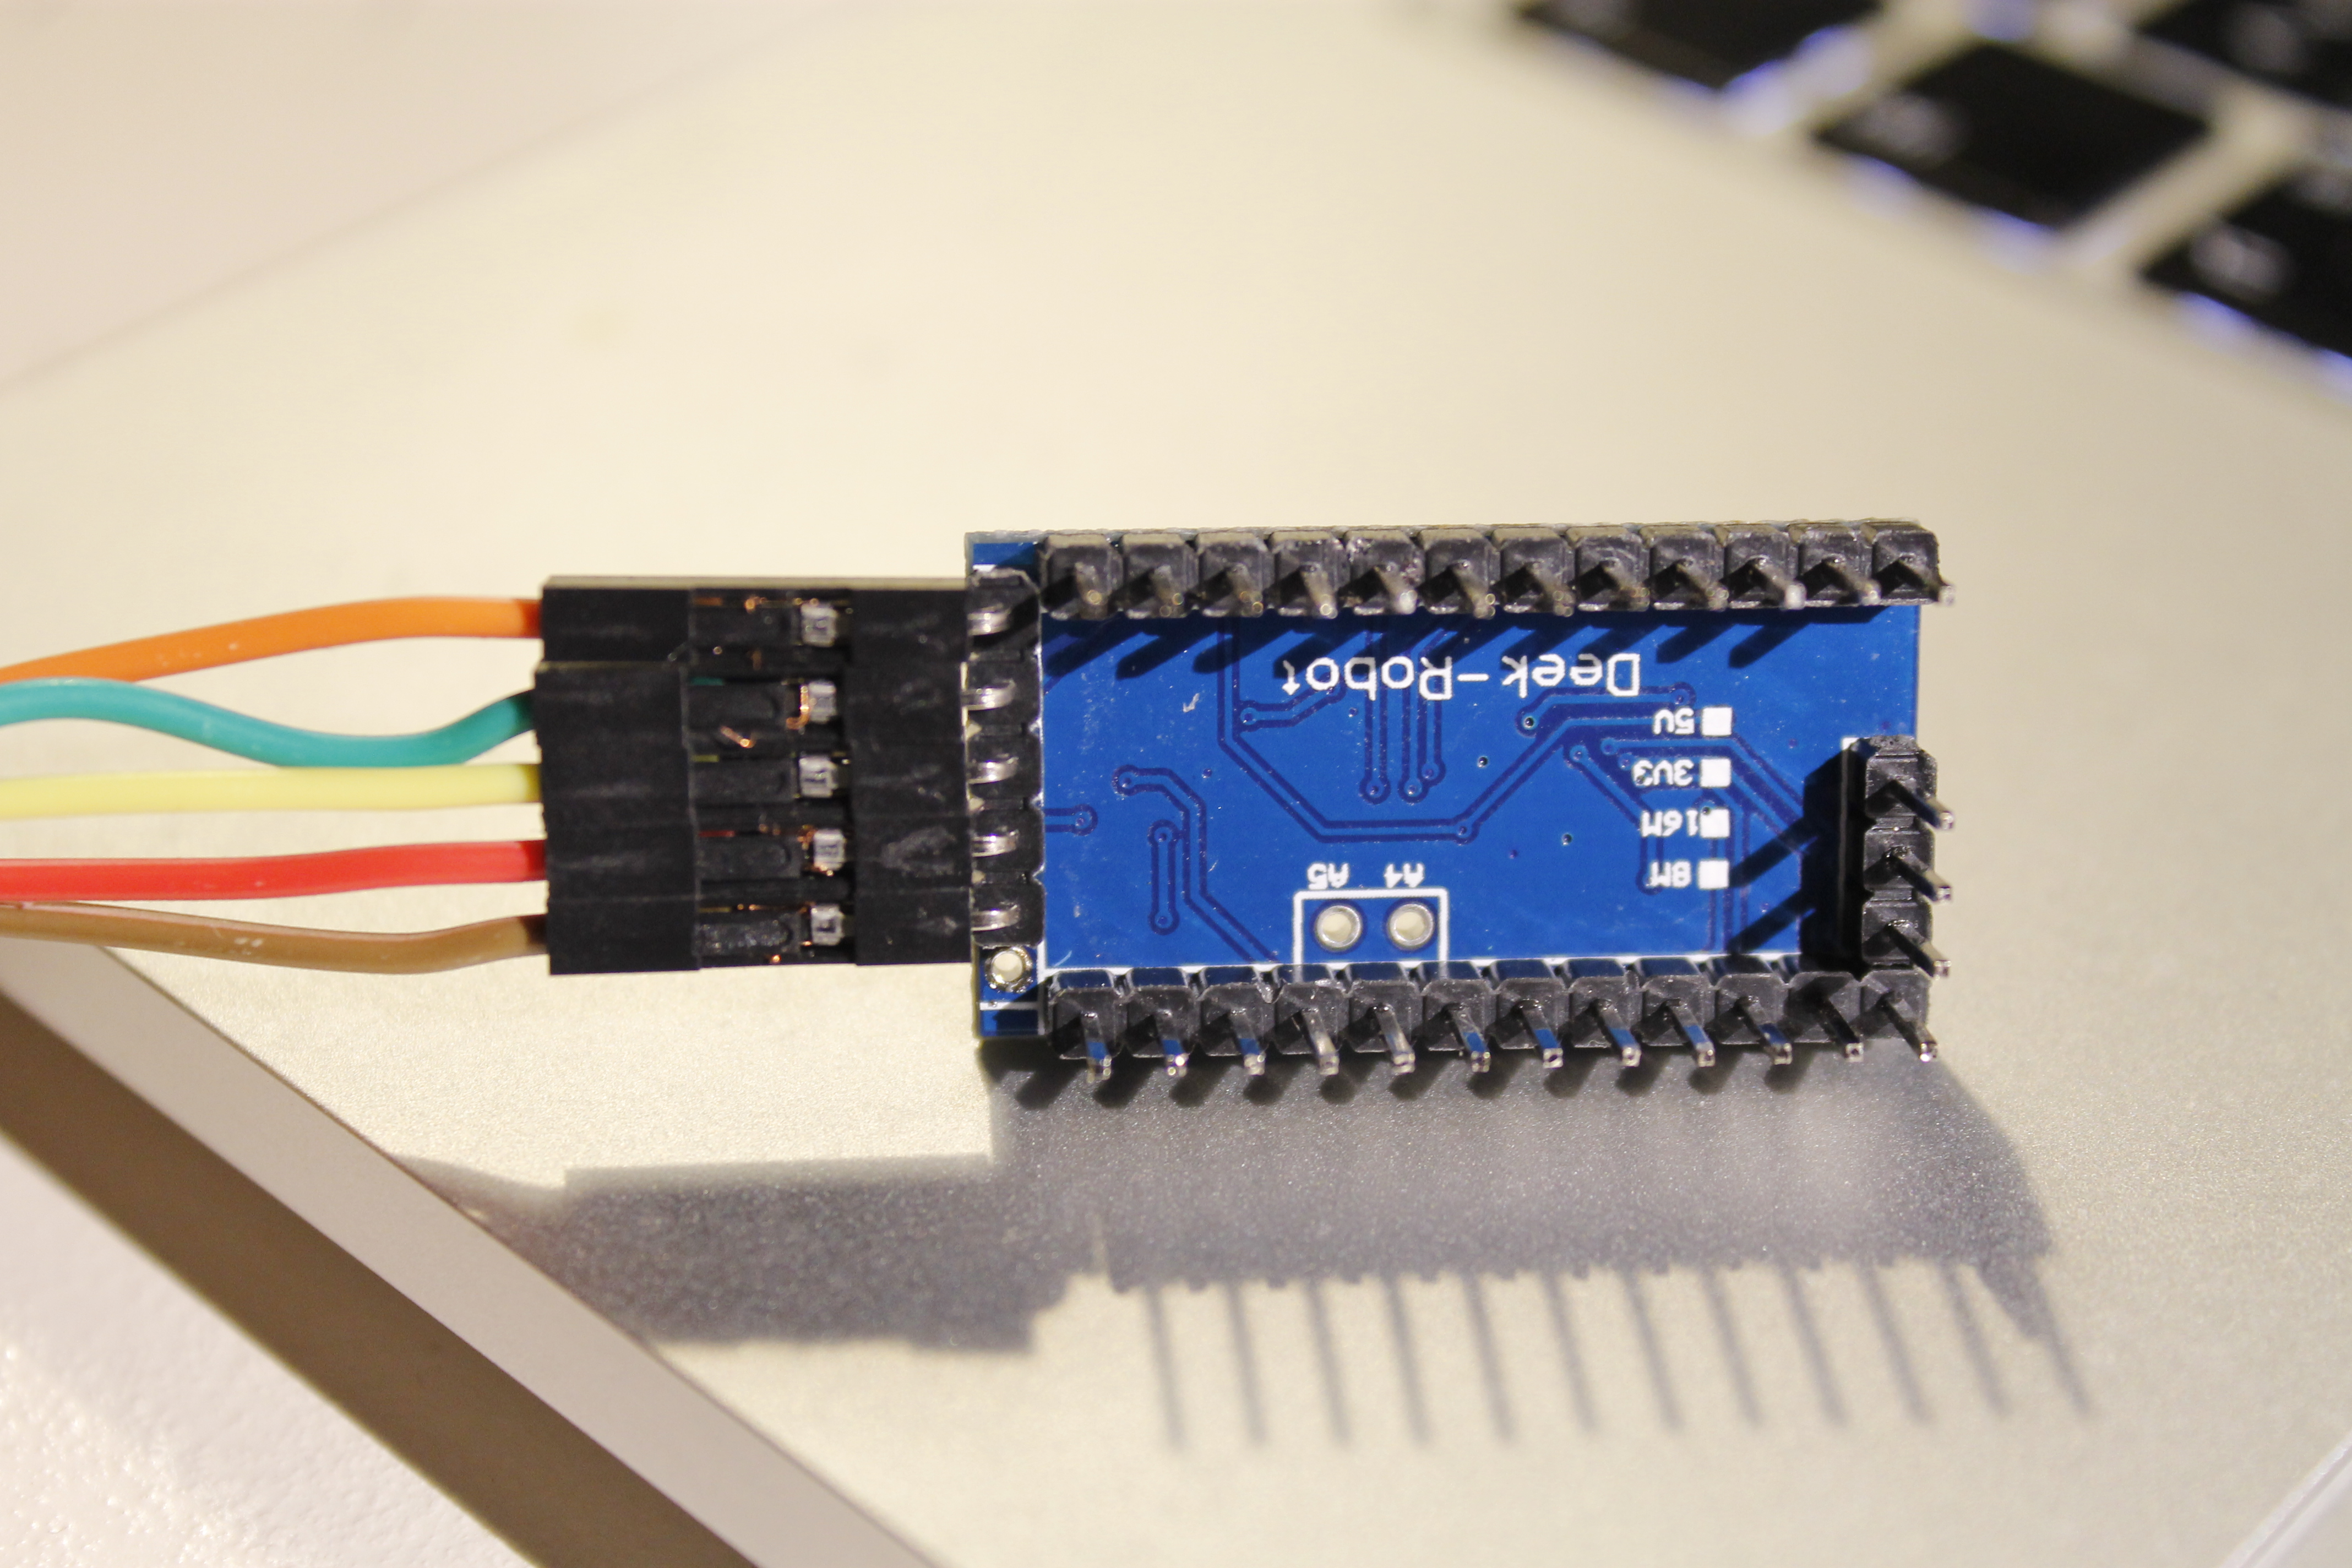
Boards that I’ve used.
Comments
7 responses to “Programming Arduino Mini Pro with FTDI USB-to-TTL serial converter”
Hi Trevor, congratulations for yout clear and very useful work!
I followed your tutorial to program my Funduinos( Mini pro clones) but I’m still scratching my head.
I checked all connections multiple times, tried two different Funduinos, reloaded the bootloader
(just to be sure it was ok), checked all IDE settings but stll can’t upload any trivial sketch.
I don’t know how critical is the timing to let the reset button go: how can I be sure to release it
at the right time?
I’m using an FTDI232 USB-to-TTL (jumper set to 5V) on Win 7 Arduino IDE: when upload starts
the green LED on it flashes quickly 3 times and nothing more. The IDE tries 10 times (set in verbose mode)
and everytime says: “avrdude: stk500_recv(): programmer is not responding
avrdude: stk500_getsync() attempt 10 of 10: not in sync: resp=0xa8”.
The resp code changes in different upload tries (sometimes it’s 0xbd, 0x95 etc) but remains the same in the ten tries.
Please, can you hint me anything to get out of this nightmare?
Thanks in advance for your time!
Hi Enzo,
-Try via and (powered) USB HUB sometimes new high speed computer USB outputs have some communication problems.
-Press reset button close to 1 sec.
-Try also unplug USB before every unsuccessful transfer. I know this is not nice at all but at least to be sure if it does at least once time.
-Also are you sure you have the same TTL board as mine? Different models can be slightly different I don’t know.
-My mini pro was 16mhz is yours the same?
I hope that’s helps.
Sorry for your trouble.
Thanks Trevor, I’ll give it a try but with the same USB PC port I uploaded hundreds of Arduino UNO without any problem!
About reset: my doubt is when “exactly” release the reset button?!? Someone suggests to insert a capacitor (.1 uF or .01 uF in series between the reset and DTR: did you ever try?
The board seems to have the same layout and components, mine have a red PCB and the connettor’s pins are in the same order but reversed.
My mini Pro is 16 Mhz, too.
Hi,
I said HUB because I couldn’t get work Digispark/Digistump on my computer’s (MacBook) USB then I passed through external USB hub. It’s weird isn’t it ? We used to hear don’t use hub, connect directly etc. This is why I thought might be the same reason you couldn’t get upload. I’d love to remember and say you the exact time for reset button but it’s more than a year. I regret that I didn’t take a video. It could be clear. I tried capacitor for auto reset when I used Arduino as ISP. It was an essential component. If I reconnect my Arduino mini with this TTL converter I’ll shoot a video, sure.
Is there a difference between the pro minis on the market? I’m looking to purchase one and it seems that there are a lot of 3rd party manufacturers which make them? Are they any different in terms of quality or performance? Here’s the one I want to buy: arduino pro mini.
Thanks,
Gary
Hi Gary,
I don’t think performance difference can be different but there are many 3rd part manufacturers quality is varying. Yours look normal 🙂 Also you should consider correct working voltage and cpu clock speed. There are 2 sorts: 5V/16MHZ or 3.3V/8MHZ.
Sorry for my late answer; it’s because of daily SPAM loud!
Hi Trevor,
Thanks a lot. Great tutorial. Helped a lot.
/ Henrik